up to 10% OFF!
DNS-1926 Switch joy con function and operation
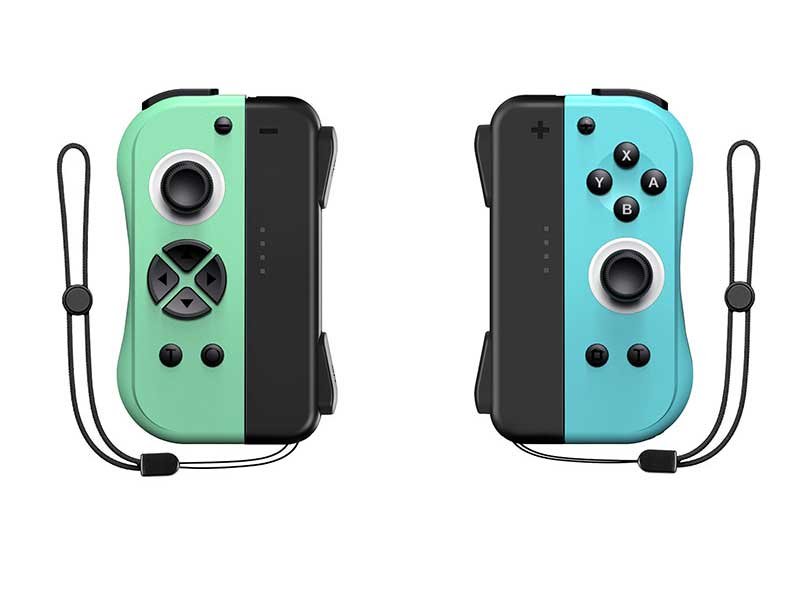
DNS-1926 Switch joy con grip is similar to the official Switch joy con grip. This joy con controller has built-in six-axis gyroscope and vibration motor, and supports NFC, Turbo function, wake-up function, etc. This article mainly introduces the operation mode of DNS-1926. Of course, some common settings are also applicable to other joycons for Switch.
DNS-1926 Switch joy con grip operating:
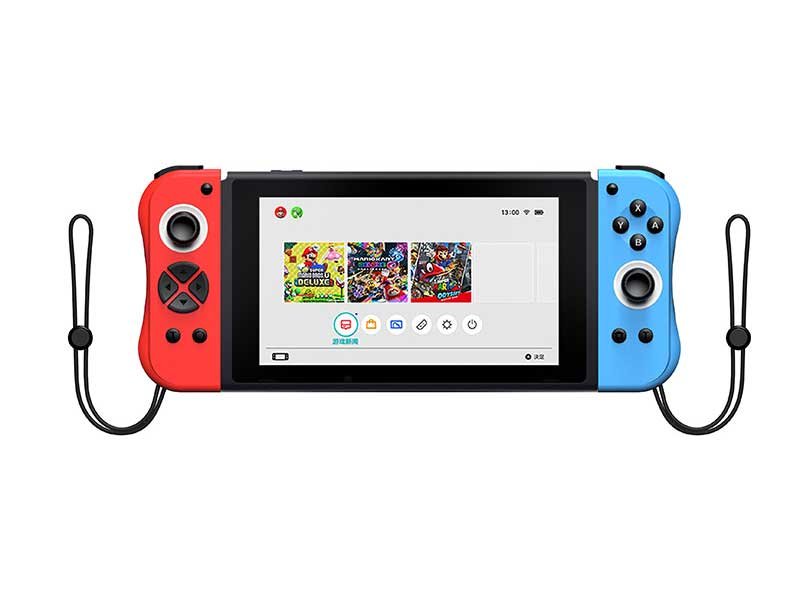
Handheld mode connection
After the Console is turned on, insert the left and right controllers into the sliding slots respectively.
Bluetooth mode connection
- Turn on the Bluetooth function, click on the console homepage: System setings -> Airplane Mode -> Controller Connection(bluetooth);
- Bluetooth pairing mode, click on the console homepage: Controllers -> Change Grip/Orde;
- Press and hold the controller pairing button (PAIR) for 3 seconds to enter the Bluetooth search mode. After the connection is successful, the LED indicator of the corresponding channel is always on.
Reconnect mode
After the Switch joy con grip is paired with the console once, short press any key (except L3, R3, PAIR) to enter the reconnect mode.
Home button to wake up
Press the HOME button on the right Switch joy con grip to turn on the device, then you can wake up and connect to the dormant Switch console.
Charging instructions
- Joy con controller shutdown state: LED1-4 indicators flash cyclically (2Hz) when charging, and the LED indicator turns off when fully charged;
- Joy con controller Bluetooth connection status: When the controller is connected to the power adapter via USB-C, the console interface will display the charging status;
- In handheld mode, you can also charge the controller through the Switch console.
Note: The joy con controller cannot be charged through the USB-C interface when it is in handheld mode!
Hibernation and shutdown
- When the joy con controller is in the power-on state, short press the PAIR button to enter the sleep state;
- When the Switch console closes the screen, the online controller will automatically shut down;
- When the joy con controller is in the back-connecting state and cannot be connected after 15 seconds, it will enter the dormant state;
- When the joy con controller is in the state of code matching, it will enter the dormant state if it cannot be coded after 1 minute.
Low voltage alarm
When the battery voltage is lower than 3.55V ± 0.1V, the indicator of the current working channel will flash slowly.
Turbo function
- Left Switch joy con grip: Hold down the Turbo button and then short press the button you want to set (L, ZL, L3, SL, SR, cross key), or hold down the button you want to set and short press the Turbo button. You can cancel the Turbo function in the same way.
- Right Switch joy con grip: Press and hold the Turbo button and then short press the button you want to set (A, B, X, Y, R1, R2, R3, SL, SR), or press and hold the button you want to set and then short press Turbo key. You can cancel the Turbo function in the same way.
Note: Turbo settings will all be cleared after shutting down!
Ring Fit Adventure operating instructions
- Left Switch joy con grip: After pairing with the console, the operation is the same as the official joy con controller;
- Right Switch joy con grip: Plug the right Switch joy con grip into the ring-con and press and hold the “Home” button for 1 second to enter the “Multitask Mode”. Short press “R3” key to exit “Multitask Mode”.
Built-in NFC card data
- The joy con controller comes with NFC card data, a total of 500 card data for 12 games. Different games can be switched by the combination of buttons “+” and “Home”. When the switch is successful, the corresponding LED indicator flashes for 5 seconds and then keeps on. The corresponding LED indicator will also light up when reading and writing card data in the game.
- Open the read and write amiibo interface in the game, (different games have different ways to read amiibo), and then press and hold the “R3” button of the controller to send the amiibo data. After reading the first amiibo data, the controller will automatically switch to the next amiibo data. When the controller is turned off, the currently read amiibo position will be saved, and the next time it will be read, it will start to read from the saved position (once the game is switched, it will be read from the first card of the current game).
- Because the two games “Splatoon 2” and “Super Smash Bros” need to write/change amiibo data when using amiibo, we need to switch amiibo manually. Press the “Home” and “R3” buttons at the same time, and the amiibo position light will stay on for 1 second to indicate a successful switch.
- In the “The Legend of Zelda: Breath of the Wild” game, press and hold the “B” and “L1” keys to get “Wolf”.
| Sequence | Game name | Corresponding LED indicator | Number of amiibo | Game restrictions |
| 1 | The Legend of Zelda: Breath of the Wild | LED1 flashes | 500 | The same amiibo: 1 time/1 day |
| 2 | Animal Crossing | LED2 flashes | 43 | 1 time/1 day |
| 3 | Fire Emblem: ThreeHouses | LED1, LED2 flashes | 4 | 1 time/1 day |
| 4 | Diablo | LED3 flashes | 3 | 1 time/1 day |
| 5 | Fire Emblem Warriors | LED1, LED3 flashes | 17 | 5 times/1 day |
| 6 | Kirby | LED2, LED3 flashes | 5 | 7 times / each level |
| 7 | Mario Kart 8 | LED1, LED2, LED3 flashes | 40 | Unlimited |
| 8 | Super Mario Odyssey | LED4 flashes | 10 | Unlimited |
| 9 | Resident Evil: Revelations | LED1, LED4 flashes | 10 | Unlimited |
| 10 | Jikkyou Powerful Pro Yakyuu | LED2, LED4 flashes | 6 | Unlimited |
| 11 | Splatoon 2 | LED1, LED2, LED4 flashes | 10 | Unlimited |
| 12 | Super Smash Bros | LED3, LED4 flashes | 30 | Unlimited |
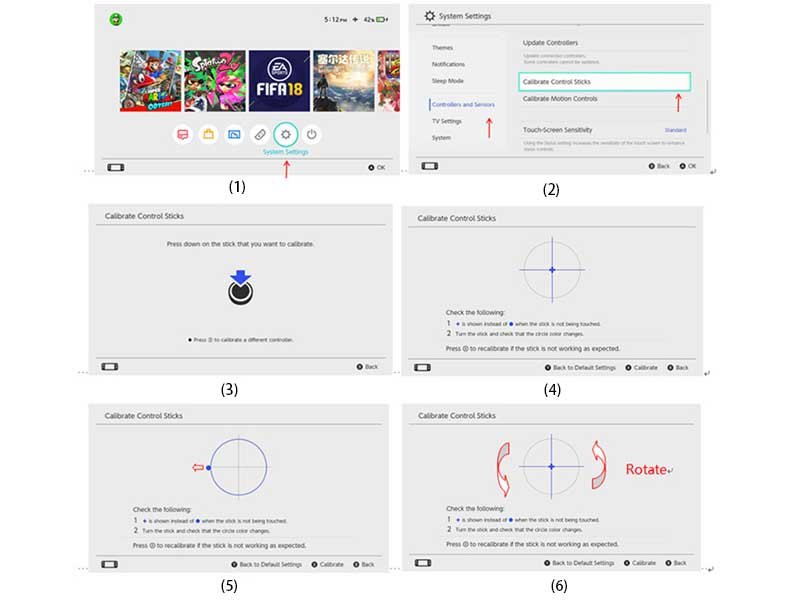
3D joystick calibration
When there is a problem with the 3D joystick, you can calibrate the 3D joystick through the console, as shown in the figure below.
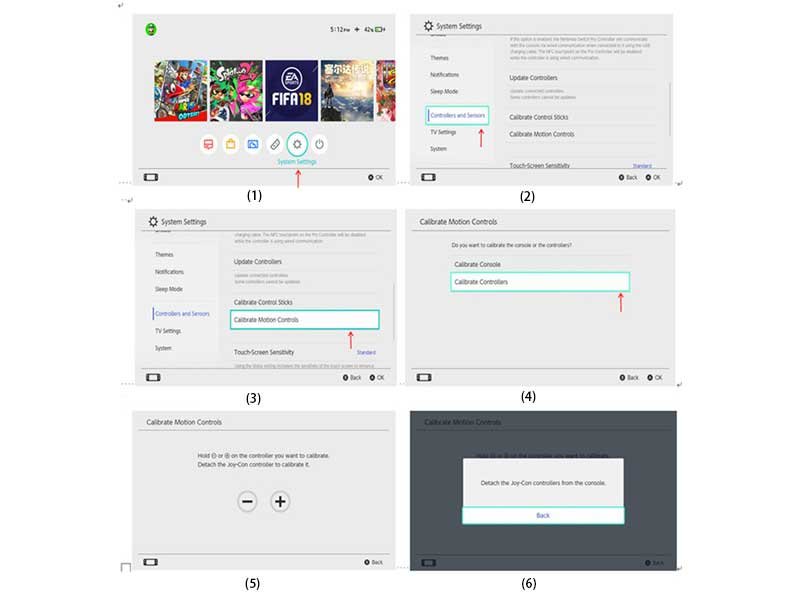
Sensor six-axis calibration
If the axis sensor on the joy-pad has an abnormal problem, you can try to restore normal operation through the axis calibration function. In the online state, enter the sensor calibration interface from the console. Place the controller on the horizontal surface and press the “+” or “-” key.
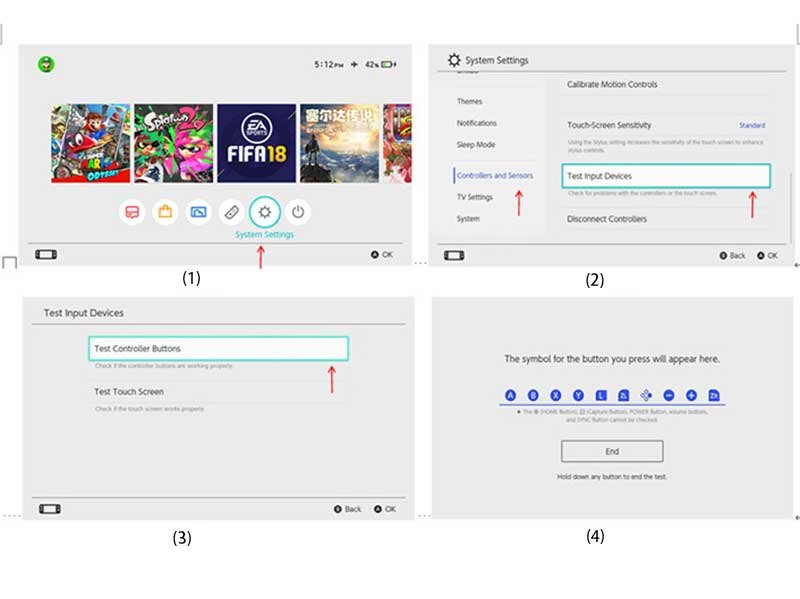
Key test
If the keys on the joy-pad fail, you can test it through the console. The operation method is as follows.
Reset function
If the controller is abnormal or crashed, if you press the pairing button “PAIR”, it can’t return to normal, you can reset it by pressing the reset button at the back.
joy con controller software upgrade
If the console update causes the joy con controller to be unusable, you can upgrade the controller via USB.
Operation method: open the upgrade software on the computer -> connect the controller to the computer via USB -> press and hold “L3” (or “R3”) -> the upgrade software displays “Connected” and the controller starts to upgrade